We booked our wedding venue last week. We are now officially getting married on October 16, 2010. I'm psyched. I love fall, and that should be right around peak foliage. Our venue is a small family-owned ski resort in western Mass. It's going to be just lovely with all of the leaves changed. We're hoping to have the ceremony outside,
either here:

or here:

but if it's too cold or rainy or (heaven forbid!) snowy, they also have a nice indoor backup space for the ceremony:

And this is the lodge where the reception will be. We lucked out and were able to see it all decorated for another wedding.

The best part is that this was one of both of our favorites out of the 9 sites we visited, just from a purely personal/aesthetic (non-budgetary) perspective, but it also happened to be the cheapest! Clearly it was just meant to be :)
Now we just have to decide on a menu, find a photographer, an officiant, figure out decorations, get a dress, etc., etc., etc... It's amazing how many decisions there are to make. Good thing we have a full year to do it, though I'm sure it'll just fly by!
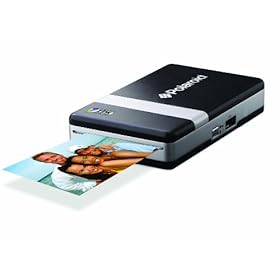
Check out this fun little gadget we picked up for the reception.

We had been talking about getting a Polaroid camera so people could snap pictures of themselves and put them in the guest book, but it turns out the Polaroids of old are no longer being made! Shocking, I know. BUT, they do have these fun little combo digital camera/mini printer thingies that fill a similar purpose. Since we already have 3 digital cameras between the two of us, it seemed a little silly to get another one, but they also sell just the mini printer. So I wrote it down in my "ideas" notebook so I wouldn't forget, and a few days later, the exact printer was the Amazon deal of the day! It was marked down to $30 from its usual $48, so of course I just had to buy it. It came a few days ago and it's so cute!
It's about the size of a mass market paperback book, maybe a little smaller. The paper that it takes is 2"x3" and has adhesive backing. So people can just print out a little pic, peel off the back, and stick it right in the guest book! I'm so excited about it. I'm thinking of setting up some kind of a backdrop for a sort of DIY photo booth. It'll be like an instant scrapbook that I don't have to spend hours upon end putting itty bitty photo corners on my pictures. (I still haven't finished my scrapbook from Ireland. So close... Oh so close...)
In other news, we finished the top for the neverending quilt! So maybe, just maybe we'll actually finish it by my self-imposed deadline of the end of this month. We already have fabric for the back, and we have the batting, but we aren't sure what we're doing for the binding yet. So that could be a hangup... I guess we'll just have to see how it goes, but the chilly weather is definitely providing additional incentive!